

Project Description
Using simple sewing techniques create this beautiful, handy organiser.
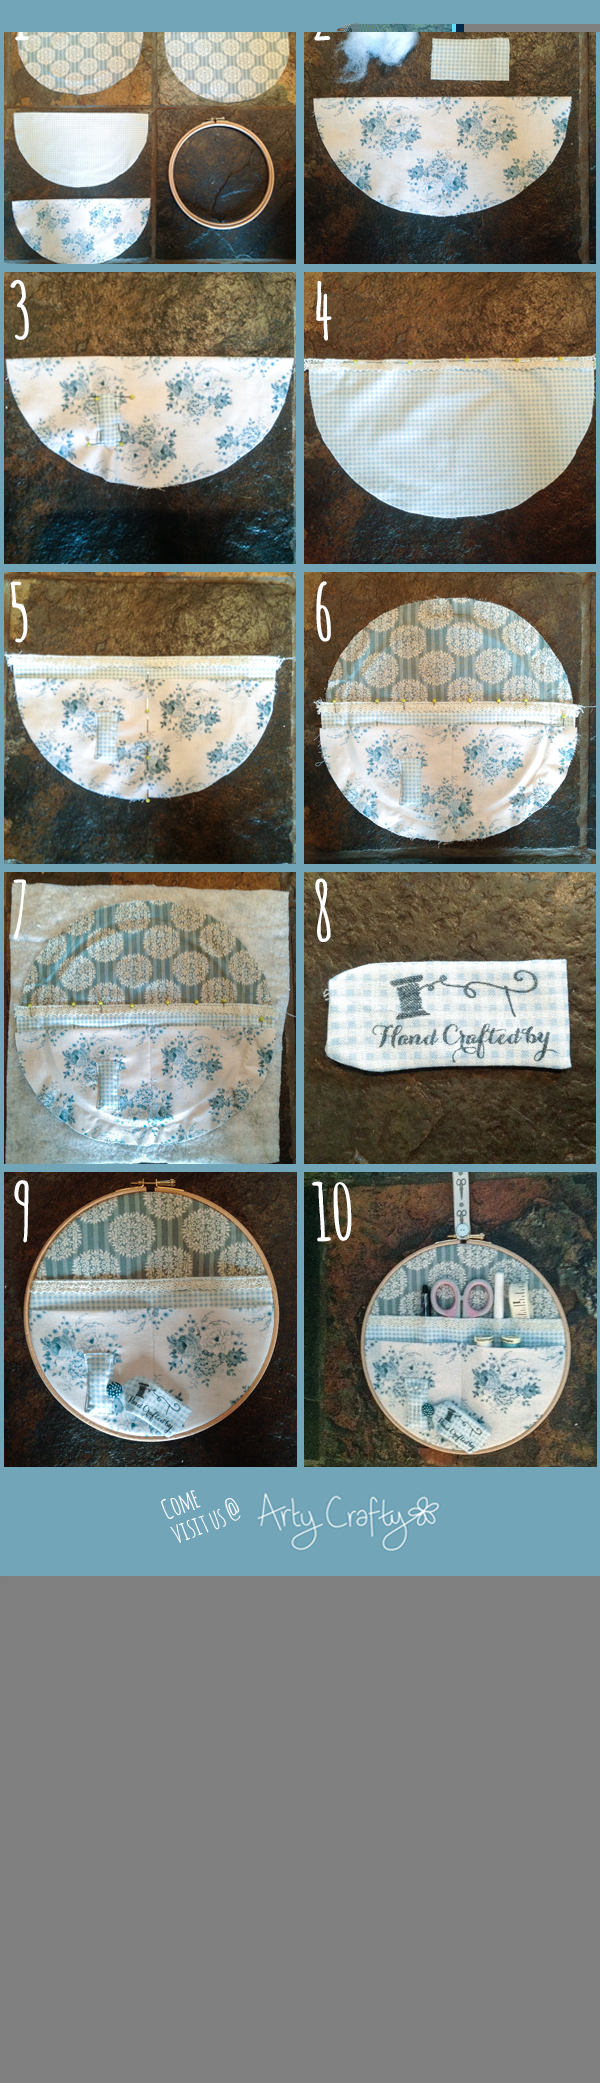
Cut out three circles of different fabrics which are the size of your hoop plus 3 cm all around. (Picture 1)
Fold the fabric for your front pockets in half and if required, attach to one side a small piece of fabric over a small amount of toy stuffing using a small running stitch to make a pincushion (Picture 2-3)
Fold the fabric for your middle pocket in half and attach lace or trimming, if desired along the top edge. (Picture 4)
Lay the top pocket on top of the middle pocket leaving approximately 2.5cm of the middle pocket showing at the top. Stitch by machine or hand, up the middle and trim top pocket around the bottom edge to match middle pocket ( Picture 5)
Space out your desired pockets along the middle fabric and placing the front fabric to one side whilst you work these pockets, stitch attaching to the back fabric as you go. (Picture 6)
If required place a small amount of wadding behind the fabrics for body. (Picture 7)
If desired stamp a fabric label with a sentiment (Picture 8)
Attach fabric label and any other desired embellishments then stretch the fabrics over your embroidery hoop and tighten.(Picture 9)
If you would like, trim the fabric at the back and hem a piece of backing fabric all around the hoop to neaten.
Fill with all the tools that you may need (Picture 10)


